All things
Propagation.
We take a look at propagation, what it is and how to do it!
Propagating your plants is an easy and rewarding way to create more of the plants you love. In this article we have a quick look at what propagation is and some different ways to propagate your plants. This includes cutting plant roots.
First of all, what is Plant Propagation? To put it simply, it’s a process you can go through in order to create new plants from your already existing plants. You take something from a plant you already own, like a seed, a basal cutting or a root and repot it to grow on it’s own. Propagation can be done several ways, using seeds, roots, stems or the leaves of your plants and can be done to any plant.
One of the benefits of propagating your plants is that it’s very inexpensive. It’s a chance for you to learn something new and in the long run it could save you a lot of money. It could even make you money selling the plants you propagate! You also need minimal equipment to do it. So let’s take a look into the different ways you can propagate your plants.

1. Propagation by saving & sowing seeds indoors
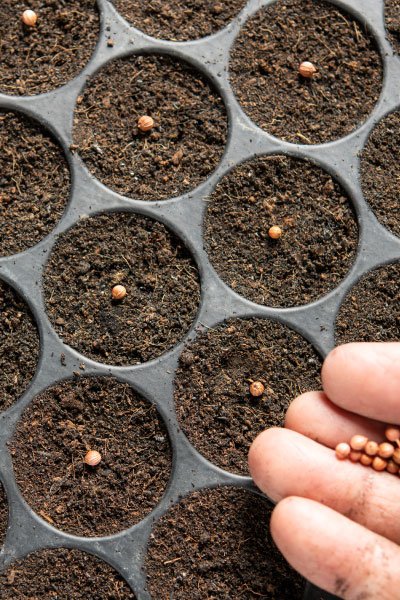
The first way to propagate the plants you’re looking at is by growing your new plants using seeds collected from other plants in order to grow new ones. This is one of the cheapest and most effective ways of propagating your plants.
We’re only going to cover doing this indoors. We feel for beginners, this is a lot easier than growing outside. This is because it’s got a higher success rate and has more reliable conditions in order to give your seeds the best possible start.
You can propagate seeds very easily. Many gardeners will suggest using a propagation kit like our plug life propagation trays which are a great investment. However, if you are unable to buy propagation trays then you can use alternative containers and compost. Just make sure that they allow excess water to drain away properly.
You will need peat free multi purpose compost for most seeds, although some seeds will need specialist seed compost to germinate. This is worth checking out if you are unsure, but for the most part multi-purpose compost will be perfectly suitable.
The most difficult part of propagation with seeds is maintaining a suitable temperature, and keeping the soil nice and moist. Some bespoke propagators come with their own plastic lid. If you’re going full DIY with this, you can use cling-film or any clear plastic bags and adhesive tape. You can also secure them on your tray or pot with an elastic band. This will help maintain the temperature for the seeds.

2. Propagation by Layering
Certain plants and trees have the ability to root themselves when the plants stems make contact with the soil around them.
The idea behind layering is that the new plants remain partially connected to the original or mother plant while it forms new roots. It can be done manually or in some cases it can occur naturally. The best thing about layering is that it doesn’t require any special equipment or controlled environments to succeed. It also uses less space than many other techniques of propagation.
There are several different ways in which you can propagate by layering depending on what plant you are propagating. To see which you need to go for, please conduct your own research to ensure you proceed with the correct techniques!
3. Propagation by Division
Propagation by division is a great way to propagate your plants, especially your perennial plants (plants that live for more than one year, unlike your annuals). This also helps plants recover as once separated there is less root material to compete for water and nutrients. Dividing your plants can differ slightly if your dividing a perennial plant, or a house plant.
Dividing a perennial: dividing a perennial plant can seem quite a brutal process, but it’s simple to do and your plants will love you for it. Once you have got your plant, finding a good divide is important. When you have found your divide, you can (carefully) tease apart the roots, or chop them using a sharp knife or spade. Once this is done, repot your new plants.
Dividing a house plant: dividing a house plant is a bit more of a delicate process than your perennials. It’s a similar process in the beginning, trying to find the gaps where the clump of compost/soil can be separated into smaller sections.
Once you have found your gap, you can tease apart the compost or soil with your hands. Alternatively you can use a knife again and make them into smaller sections. From here we recommend cutting away any weak or dead sections of the plant you can see and discarding them.
The same applies to the roots of your plants. If they’re looking a little under the weather it’s not a bad choice to cut off those roots to allow new, younger roots to form. A decent set of roots should be around 8-10cm.

4. Propagation from Cutting Plant Roots
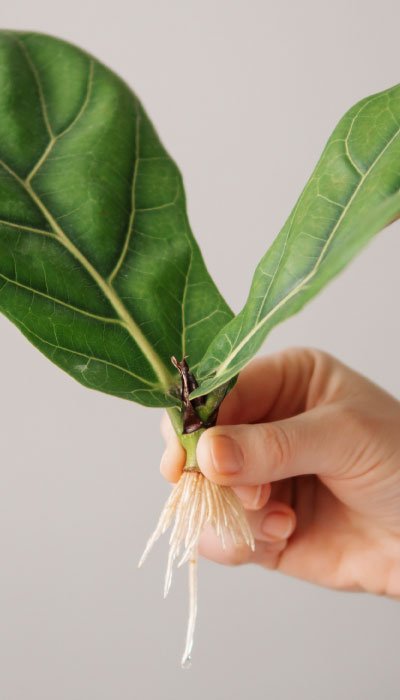
One of the biggest benefits of propagating using root cuttings is how simple it is and how little aftercare they require. By taking a few steps, you can propagate a large number of plants without any real fancy equipment or previous knowledge of propagation. Propagation from cutting plant roots should be done around the November – March time of year. This allows your cuttings to flower in the spring of the following year. Taking your cuttings at this time gives you maximised stored energy within the root, meanwhile minimising any stress being put on to the parent plant.
When choosing your roots, ensure they’re around 5mm in diameter, or the thickness of a pencil. These are the younger more vigorous roots that are much more likely to succeed in propagation and create new plants. Cutting plant roots should always be done with sharp pruners to make a straight clean cut closest to the parent plant. On the other side of the root cutting we suggest making a diagonal cut. This helps maintain the original roots orientation, which is critical to the production of new shoots and roots.
Once you have taken the bits of root you want, cut them into sections around 3-6 inches long. The thinner the root, the longer they should be to ensure there is a enough energy in each cutting to create new roots. When cutting your cuttings, make sure the end furthest away from the plant is cut at a diagonal angle. Once this is done, replant the parent plant.
Now you’ve got your cuttings prepared, it’s important to get them planted and sorted as soon as possible to avoid them drying out. Fill up your desired container/pots with cuttings compost. Some examples are using equal parts peat substitute and gritty sand or perlite. Take your cuttings and place them around 2 inches apart. This is so the horizontal cut surface at the top of the root is just below the surface of the compost. Top them with a layer of grit (around 1cm). Water the cuttings lightly and place in an area that is protected from the cold weather or somewhere to provide them with a little extra warmth.
In the following spring, your cuttings should have started to show signs of growth and will have become well rooted in your container. This is now the perfect time to repot the plants in their own pots or containers. Why not try cutting plant roots as a propagation method yourself?
5. Propagation by Basal Cuttings
Propagating using Basal Cuttings is perfect for your perennial plants. The term basal means bottom, or foundation. So propagating using basal cuttings is the form of propagation where you cut the plant at it’s base, where the plant meets the soil. Getting the cutting with any roots is something you can do if you want to dig a little deeper. However, this is unnecessary as one of the benefits of Basal propagation is the forming of new roots.
The best time to take basal cuttings is during early spring. This is when the stems of the new plant are solid. Any later in the year and the stems become hollow which isn’t what you want. You need to cut the new cutting at the bottom, with clean pruners. Using a clean cutting tool is important to minimise any risk of fungal or bacterial disease.
Plant your cutting(s) into new clay containers filled with new dampened soil. Place your cuttings outside until rooting begins to occur. There are sources out there that say planting your cuttings around the edge of your pot or container gives a better chance of success. Always ensure you use clay containers for this method as cuttings need more oxygen, and clay containers are perfect for this. Clay containers are perfect for removing excess moisture from the soil, preventing root rot.
You can increase chances of success by putting over a clear plastic and securing over the top of your container. This will create a greenhouse-like atmosphere.
Bare in mind that rooting time will depend on what plant you are propagating. Most plants will take a few weeks to start rooting. When you see the roots coming through the drainage holes, it’s time to replant your cuttings!
These are just a few ways to propagate your plants and there are of course other methods out there. The methods we have listed are what we think are the most versatile and user friendly, whether you are a beginner in the garden or a veteran. You can find other methods online which could be more suitable to situational circumstances. Along with this there are full tutorials and other useful tips and tricks to boot.


